

Starlink Mini
Starlink Mini 12V Power, Chargers, Cables and Converters
Starlink rates the Mini power input at 12 to 48 V DC, and the 60 W ceiling sits at the top of that window. Because a vehicle socket and an RV house bank both live inside the range, the dish runs from either one without an inverter in the path. That matters more than it sounds, since an inverter wastes energy twice on the way up to mains voltage and back down again.
What the dish does not forgive is a supply that drifts outside that window while the load moves. So the two things worth checking before you buy anything are how much current the run must carry and what happens at the plug when the dish boots. Those numbers decide the cable gauge and the fuse, and they set the connector, so the sections below work through them in that order.
01 · Input
Can the Starlink Mini Run on 12V?
The short answer is yes, and the conditions attached to that yes are worth understanding. Once you know the voltage window, choosing between a battery or a socket becomes a question of connectors rather than electronics. That is why the table below separates routes by connector type instead of by brand.
What the Input Rating Actually Allows
Twelve to 48 V DC covers almost every DC source a buyer is likely to own already, which is a wider window than most sellers admit. That range includes a car socket at 12 V, a 24 V truck system, an 18 V tool pack and a 12.8 V lithium battery. Its 60 W ceiling sets the upper bound on the current the wiring must survive, which is where most installations go wrong.
Why Some 12V Setups Fail Anyway
Voltage falls along the length of a cable, and the dish pulls its heaviest current for a few seconds at boot. Both effects land on the same run of copper, so an installation that measured fine on a bench can brown out in a vehicle. Even so, the fix is cheap and it is almost always a thicker cable or a shorter run.
Six power routes compared
| Power source | What sits in line | Where it fits |
|---|---|---|
| Vehicle accessory socket, 12 V or 24 V | Step-up cable rated 60 W or more, fused at the plug | Cars, vans, rental RVs |
| 12 V battery or RV house bank | Ring terminal cable, fuse holder, correct wire gauge | Campers, boats, trailers |
| Cordless tool battery | Brand-specific adapter cable or dual battery box | Weekend trips |
| Power station or power bank | USB-C PD trigger cable, 65 W or more | Backpacking, remote work |
| Solar and portable storage | SAE, XT60 or Anderson lead from the controller | Off-grid cabins |
| Mains power | AC adapter with 100 to 240 V input | Home, campground pedestal |
02 · Draw
Power Draw and What It Means at 12V
Sizing a setup comes down to current, because current sets the cable gauge and it decides how long a battery lasts. The figures below use the published 60 W ceiling for peaks, together with a steady load in the high teens of watts drawn from field reports. Both numbers are conservative enough to plan against, yet they still describe a dish that runs from a small battery.
Rated Input and Real World Draw
Sixty watts is a ceiling rather than an average, and it shows up for a few seconds while the dish boots. Those reports put steady draw in the mid to high teens of watts when the sky is clear. Such a figure climbs when the dish hunts for signal through trees, so a bad mounting angle costs battery as well as bandwidth.
Plan on 20 W of continuous load and 60 W of headroom, which keeps every number later in this section on the safe side. That margin also covers cold mornings, when a lithium pack delivers less than its label promises. Keep both figures in mind and you avoid building a system around the best case.
Amps, Wire Gauge and Voltage Drop
Twenty watts at 12 V works out to roughly 1.7 A, while the boot peak reaches about 5 A. Cable drop is calculated over the round trip, so a 7 metre run carries current through 14 metres of copper. Such a table uses 1.5 A continuous and a 3 percent target, which is the rule most 12 V installers work to.
| Cable run, one way | 18 AWG | 16 AWG | 14 AWG | 12 AWG |
|---|---|---|---|---|
| 3 m | 1.6 % | 1.0 % | 0.6 % | 0.4 % |
| 5 m | 2.6 % | 1.6 % | 1.0 % | 0.7 % |
| 7 m | 3.7 % | 2.3 % | 1.5 % | 0.9 % |
| 10 m | 5.2 % | 3.3 % | 2.1 % | 1.3 % |
| 16 m | 8.4 % | 5.3 % | 3.3 % | 2.1 % |
| 20 m | 10.5 % | 6.6 % | 4.1 % | 2.6 % |
Read the drop figures as the maximum run for each gauge, worked from copper resistance at 12 V. So 18 AWG holds under 3 percent to about 5.5 metres, and 16 AWG reaches roughly 9 metres. Then 14 AWG covers 14 metres, while 12 AWG carries the same load to about 23 metres.
Past those distances, raising the voltage with a step-up converter works better than buying heavier copper. That is because the same watts travel on proportionally less current once the voltage goes up. So a thin cable becomes usable again, and the adapter costs less than the copper would.
How Long a Battery Actually Lasts
Runtime is capacity divided by average draw, then discounted for the losses inside a power station. Use 20 W and about 85 percent usable energy, which is realistic for lithium units that stop before empty. Those two assumptions give the hours below, and cold weather will shorten them further.
| Battery capacity | Straight division at 20 W | Realistic at 85 % usable |
|---|---|---|
| 200 Wh | 10.0 h | 8.5 h |
| 500 Wh | 25.0 h | 21.2 h |
| 1000 Wh | 50.0 h | 42.5 h |
| 1500 Wh | 75.0 h | 63.8 h |
03 · Car socket
Charging a Starlink Mini From a Car Socket
The accessory socket is the quickest route in a vehicle, and it is also where most setups disappoint. Sockets are rated loosely on the box, and adapters vary in what they actually deliver under load. So pick a cable rated for 60 W or more, and check that it accepts both 12 V and 24 V input.
Step-Up Cables for the Accessory Socket
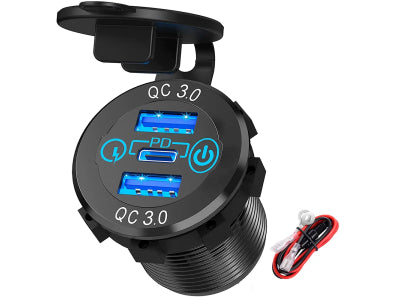
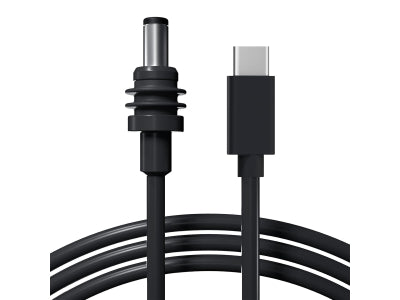
A step-up cable lifts socket voltage to 30 V or 36 V, which cuts the current flowing through the cable. That lower current keeps the dish inside its window even when the vehicle system sags. These options start at a basic 60 W cord and finish with a 140 W dual-port charger that has a voltmeter built in.


When a Bigger Charger Is Worth It
A plain 60 W cord handles a single Mini on a short run without any trouble. It is worth spending more when you want to charge a laptop from the same socket, or when the vehicle runs a 24 V electrical system. Such chargers also show live voltage, which tells you whether an older socket is sagging under load.
04 · Battery
Wiring the Dish to a 12V Battery Bank
Bolting cable straight to the battery gives the cleanest 12 V feed and wastes the least power. It also moves the safety work onto the installer, because nothing in the circuit is protected until a fuse goes in. That is why the parts below are grouped by connector type, so you can match whatever your bank already uses.
Bolting Cable Directly to the Posts
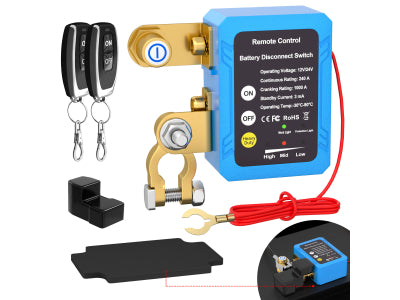
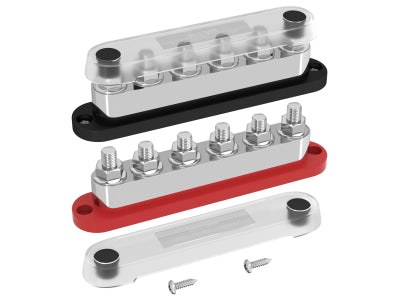
A ring terminal cable bolts to the posts or to a busbar and removes every plug from the path. Keep the fuse within 30 cm of the positive terminal, and route the cable clear of sharp edges and hot surfaces. This is the arrangement most RV owners end up with, and it pairs well with a switch that isolates the dish when the vehicle sits idle.
-
Bolt the cable to the posts
Use a ring terminal cable on the battery posts or on a busbar, so the run has no extra plug in the path.
-
Fuse the positive lead
Fit the fuse within 30 cm of the positive terminal. The fuse protects the cable, and nothing else in the circuit does that job until it is there.
-
Route the cable clear of damage
Keep the lead off sharp edges and hot surfaces, and clear of hinges and standing water.
-
Add a way to isolate the dish
Pair the run with a switch so the dish can be turned fully off when the vehicle sits idle.
Matching Anderson, Powerpole and XT Connectors
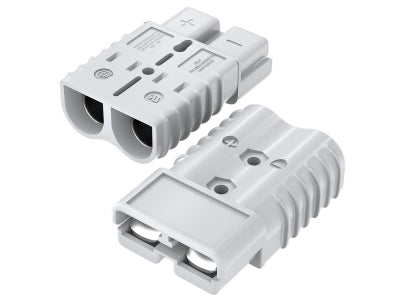
Anderson SB50 and Powerpole plugs are the standard for portable 12 V gear, while XT60 and XT30 appear on power stations and solar controllers. Match the plug to your source instead of stacking adapters, since every extra joint adds resistance and a place for water to sit. Each cable below arrives with the plug already terminated, which removes the usual cause of a setup that never powers up.


05 · Tool packs
Running the Dish on Tool Batteries
If you already own cordless tools, the packs in your van are the cheapest supply you have. An 18 V pack sits inside the window the dish accepts, so an adapter replaces a dedicated power station. Both formats exist, and the choice between them comes down to how long you plan to stay offline.
Cables That Clip to One Pack
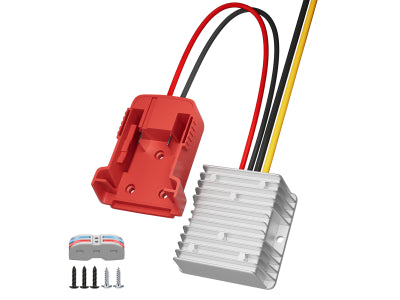
A single battery cable is the lightest option, and it suits a short session rather than a full day. That pack holds roughly 90 Wh at 18 V and 5 Ah, which is about four hours at 20 W before losses. Take a spare pack, or move up to the two-pack box when the session runs longer.
Boxes That Hold Two Battery Packs
A dual box holds two packs and combines them, so runtime doubles while the load on each pack halves. Those boxes suit a full evening or a long cloudy day, and the switched versions let you cut power without pulling the cable. Both DeWalt and Milwaukee lines are stocked deepest, and both appear in the kits further down.


06 · USB-C
Powering the Dish From USB-C Banks
USB-C support arrived quietly, which is why the search results for this route are still thin. Two conditions decide whether a bank will run a Mini, and both concern the power profile rather than the capacity printed on the box. If you ignore either condition, the dish boots and then drops the link once the load settles.
Why 65 Watts Is the Real Floor
Anything below 65 W will start the dish and then fail to hold a link. That is why a 100 W pack makes more sense, since it leaves room for the boot surge on a cold morning. Those numbers explain why a 45 W laptop charger is a false economy even when the label looks generous.
Trigger Cables That Display the Voltage
A trigger cable asks the pack for a specific voltage, and the versions with a display show what actually reached the plug. Such a readout matters when a pack claims 100 W but drops to 45 W under load. That 99 Wh bank sits under the airline carry limit and works with any of these cables.


07 · Solar
Going Off Grid With Solar and XT60
Off-grid power for a Mini is mostly a problem of matching connectors rather than finding watts. Solar controllers usually expose screw terminals or an SAE lead, while portable storage tends to use XT60 or Anderson. One adapter in the middle solves it, provided the voltage stays inside the window and the cable carries the current.
Wiring the Dish Through a Controller
A charge controller sits between the panel and the dish, and it holds the output steady as light changes. It is worth repeating that a panel must never run straight into the dish, since an unregulated panel can push past the 48 V limit. Keep the controller output at 12 V or 24 V and the rest of the setup behaves like a battery feed.
Using Portable Storage and XT60 Leads
Portable power stations usually offer an XT60 outlet, and some also expose an Anderson socket. Those outlets already sit inside the voltage window, so a matching lead is all you need. Each option below terminates in the dish plug, which avoids a chain of adapters in the rain.


08 · Mains
Using Mains Power at Home or Camp
Mains power is still the simplest option wherever a socket exists, and a spare adapter earns its place in a bag. Both adapters below take 100 to 240 V input, so they travel between countries without a transformer. Because it costs less, the smaller unit works well as a permanent second adapter for a cabin or an office.


09 · Kits
Kits We Have Tested on the Road
The kits below are combinations we have run on the road rather than suggested parts lists. Each entry names the parts and the total, so you can copy a working setup instead of assembling one from scratch. Those totals reflect current list prices, so check the individual product pages before ordering.
| Kit | List total | Includes | Fits |
|---|---|---|---|
| The Car Kit | US$65.98 | 60 W step-up cable for the socket, 3 m DC extension | Cars and vans |
| The RV Kit | US$88.97 | Fused ring terminal battery cable, Anderson SB50 portable lead, sealed wall entry | Full time RV use |
| The Off Grid Pack | US$50.98 | Makita 18 V adapter cable, 3 in 1 DC spare | Weekends and backpacking |
The Car Kit and What It Covers
A 60 W step-up cable plus a 3 metre DC extension covers most cars and vans. That pair runs the dish and still fits in a glovebox when the drive ends. Take the voltmeter version when the vehicle is older or the socket sits behind a long run of factory wiring.
The RV Kit for Full Time Use
A fused battery cable and an Anderson SB50 lead do most of the work, and a wall pass-through finishes the entry. Each joint stays serviceable, and the dish goes fully off at the battery when the rig parks for weeks. Those parts are exactly what most full-time owners end up buying separately anyway later on.
The Off Grid Pack for Weekends
One tool battery adapter cable and a 3 in 1 DC spare keep the pack under a kilogram. That pack suits a weekend, and runtime scales with how many batteries you carry. Where a power station is already on board, swap the adapter for a USB-C trigger cable and use the same 20 V path.
10 · Cable
Sizing Cable and Fusing the Lead
Once the parts arrive, two decisions protect the installation, and both take a minute to get right. A fuse belongs at the source rather than at the dish, which matters when the run passes through a bulkhead. Water ingress is the other one, and it is the detail most installations skip.
Choosing a Fuse That Protects the Cable
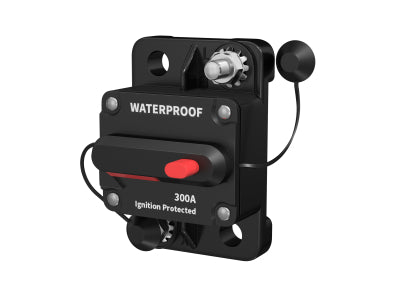
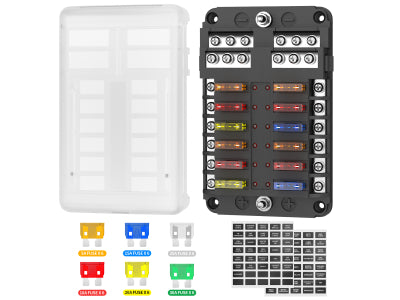
Use 10 A for most 12 V runs, and move to 15 A where the cable is long or the boot surge is steep. Those ratings protect the cable rather than the dish, which is the point people miss when they buy a fuse. Because the 24 V version pulls about half the current, 7.5 A is enough in that case.
| Installation | Fuse rating | Why it fits |
|---|---|---|
| 12 V socket adapter, run under 7 m | 10 A | Covers the boot surge with margin |
| Direct battery feed, 10 to 16 m | 15 A | Longer runs see more inrush current |
| 24 V vehicle system | 7.5 A | Half the current for the same wattage |
| Tool battery adapter, 18 V pack | 5 A | Protects the adapter and the pack |
Keeping Water Out of the Joints
A wall pass-through with a proper gland beats a drilled hole filled with silicone every time. That fitting keeps the cable entry sealed when the dish sits outside overnight in rain. Keep an IP67 inlet on the exposed plug as well, and the usual first-season failure never happens.


11 · Questions
Questions Buyers Ask Before They Buy
These are the questions that arrive by email most often, answered with the numbers used above. Each answer stands alone, so you can read one without working through the whole page. Where a figure depends on your vehicle or battery, the answer names the assumption behind it.
Starlink rates the input at 12 to 48 V DC and 60 W, which covers a 12 V battery or a vehicle socket directly. Because the dish accepts DC, an inverter only adds two conversions and wastes energy. Keep the fuse near the battery, and size the cable so voltage holds while the dish draws current.
Expect about 1.5 to 1.7 A of continuous draw at 12 V, with a short surge near 5 A at boot. That surge is why a 10 A fuse suits most installations rather than a 5 A one. Long runs and cold starts make 15 A the safer choice, since each adds resistance or voltage sag.
It is not always needed, yet it helps on a long run or a tired battery where voltage sags under load. That step up to 30 V or 36 V cuts the current travelling through the cable. Such a converter is what vehicle kits include, and it is the reason they tolerate a 10 metre run.
Yes, as long as the socket delivers 60 W or more and the adapter accepts 12 V and 24 V input. Check the socket under load, because many older vehicles drop well below 12 V. That check takes a minute with a voltmeter, and it saves a wasted purchase.
Yes, provided the source delivers 65 W or more over PD and the cable triggers 20 V. Below that figure the dish boots and then loses the link once the load settles. That failure looks like a dish fault, so test with a known 100 W pack first.
18 AWG holds to about 5 metres, while 16 AWG reaches 9 metres before drop passes 3 percent. Past those distances, 12 AWG carries the same load to about 23 metres, and 14 AWG sits in between. Anything longer should raise the voltage with a converter instead of buying heavier copper.
Yes, since an 18 V pack sits inside the 12 to 48 V window the dish accepts. A 5 Ah pack holds roughly 90 Wh, which works out to about four hours at 20 W. Dual boxes take two packs at once, which suits a full evening rather than a short session.
Plan on roughly 21 hours at a 20 W average with about 85 percent usable capacity. Cold weather and heavy downloads shorten that, so 15 hours is a safer figure for a weekend. Those numbers assume a clear view of the sky and a pack that starts full.
Yes, provided a charge controller sits between the panel and the dish and holds the output steady. Keep that output at 12 V or 24 V so the input stays inside the rated window. An XT60 or Anderson lead from a power station does the same job without a panel at all.
No, because the dish takes DC power through its own input and Ethernet runs separately. That means a PoE injector will not run it, however much the port can deliver. Use the DC input for power and an SPX to RJ45 adapter for the network.
12 · Parts
Choosing the Right Parts for Your Setup
Start from whatever power source you already own, because that choice decides the connector and the cable. Those collections hold the full range, and the guides go deeper on parts that need more explanation. If you are unsure which route fits, the source table near the top of this page is the fastest way to decide.
Match the Parts to Your Source
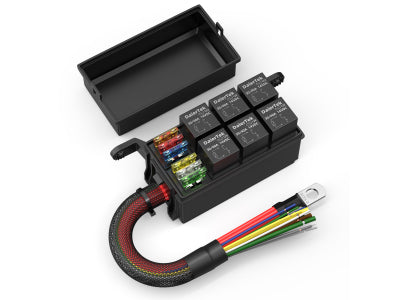
Starlink Mini accessories holds the dish leads on this page. All Starlink accessories is the wider range. Power adapters and chargers, fuse and relay boxes, and connectors cover the rest of a 12 V install.
Where the Wiring Guides Go Deeper
Starlink power with DC boost converters walks through raising the line voltage. Running a Mini on power tool batteries covers the pack adapters. Choosing a bracket for cars and RVs is the mount guide once the power lead is settled.