


DIY Upgrade: How to Install a High-Power USB-C Charger & Voltmeter in Your Dashboard
A Step-by-Step Guide to Modernize Your Car or Boat's Charging Ports
Think about the devices you carry today compared to five years ago. Your smartphone has a massive battery. You might have a tablet for the kids, a drone for filming, or even a USB-C powered laptop for remote work.
These modern power-hungry devices demand massive amounts of energy. Yet, most cars and boats are still stuck with outdated 12V sockets or weak 1A USB ports designed for flip phones from 2010.
Here is the harsh reality: If you are using an old charger while running GPS and streaming music, your battery percentage isn't going up—it's just draining slower.
To keep up with today's tech, you don't just need a charger; you need Power Delivery (PD). You need a dedicated port capable of pumping out 30W, 45W, or even 65W to charge a MacBook or fast-charge an iPhone from 0% to 50% in just 30 minutes.
In this guide, we’ll show you exactly how to upgrade your dashboard with a high-power PD USB-C Charger & Voltmeter. It’s the single most practical upgrade you can make to modernize your vehicle, and you can do it yourself in under 30 minutes.
From sleek round sockets to rocker-style switches, upgrading your dash is easier than you think.
Why Upgrade? It’s Not Just About Charging.
Before we grab the tools, let's look at why this is the #1 DIY upgrade for car and boat owners:
-
Speed (PD & QC 3.0): Old chargers output 1A or 2.1A. Our new PD USB-C sockets can output 30W, 45W, or even 65W. That means charging an iPhone from 0% to 50% in roughly 30 minutes, or even powering a MacBook laptop directly from your dash!
-
Battery Health Monitoring: A dead battery ruins the day. Many of our sockets come with a built-in LED Voltage Display. It tells you instantly if your alternator is working (usually 13.5V-14.5V) or if your battery is dying (below 12.0V).
-
Aesthetic Upgrade: Replace those ugly plastic plugs with sleek, waterproof units featuring blue, red, or green ambient lighting.
Before You Begin: Tools, Materials & Safety
A professional result starts with proper preparation.
🔧 Tools You'll Need:
-
Drill with a Hole Saw (if making a new hole)
-
Panel Removal Tool or Screwdriver
-
Wire Stripper & Crimper
-
Multimeter (Optional but recommended)
🔌 Materials You'll Need:
-
Your chosen USB Charger & Voltmeter Socket
-
Extra Wire (if needed)
-
Fuse Tap Kit (Recommended for a clean install)
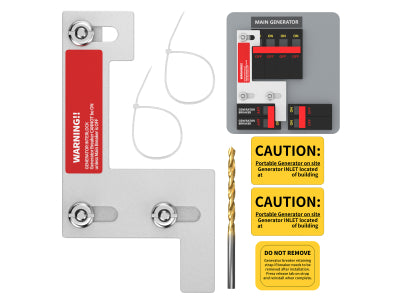
⚠️ SAFETY FIRST: CRITICAL
Before touching any wires, always disconnect the negative terminal of your vehicle's battery. This single step prevents short circuits and protects you and your electronics
Step 1: Choose Your Weapon (Selecting the Right Socket)
Look at your dashboard. What fits best?
-
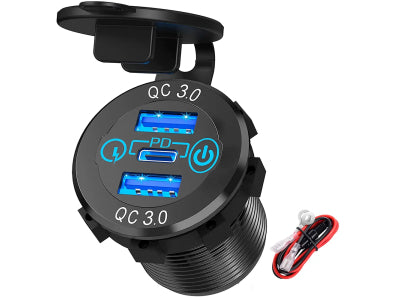
The "Cigarette Lighter" Replacement: If you have an old 12V outlet you never use, our Round Body Chargers are a direct drop-in replacement. They fit standard 1.15-inch (29mm) holes.
-
The "Rocker Switch" Style: Do you have a switch panel on your boat or 4x4? We have USB chargers designed to snap directly into standard rocker switch cutouts (like the DS2013-L). No drilling required!
-
The "Surface Mount" Panel: Don't want to drill large holes? Use our Tent-Style Surface Mount pods. Just two small screws, and you're done.
 Round, Rocker, or Panel? Choose the style that best fits your vehicle's dashboard.
Step 2: The Wiring (Simpler Than You Think)
Many people are scared of wiring. Don't be. DC wiring is straightforward: Red is Positive (+), Black is Negative (-). The most important decision is where you get your power from. You have two main options.
Option A: Tapping into the Cigarette Lighter Wires
This involves using the existing wires that powered your old 12V socket.
-
Pros: It's often the quickest and easiest method, as the wires are already in the dashboard.
-
Cons: You'll be sharing a circuit with whatever else is on that fuse. The original wiring may not be robust enough for high-power PD charging, potentially leading to blown fuses or underperformance.

No matter the power source you choose, the connection is simple: Red wire to Positive (+) and Black wire to Negative (-).
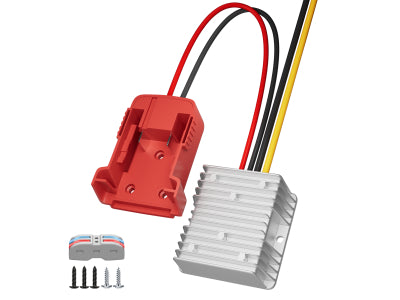
Option B: Using a Fuse Tap (Recommended Professional Method)
This method involves running a new wire from your vehicle's fuse box using a "fuse tap" adapter.
-
Pros: This is the safest and most reliable method. It creates a brand new, dedicated circuit for your USB charger, protected by its own fuse. This guarantees it will receive clean, full power without overloading any existing systems.
-
Cons: It takes about 5-10 extra minutes and requires a fuse tap kit, which is a very inexpensive part.
Once you've chosen your power source, the rest of the installation is a simple, numbered process:
-
Connect Positive (+): Connect the Red wire from the new USB socket to your chosen 12V power source. Using an "ignition-switched" source (one that only has power when the key is on) is best for most installations.
-
Connect Ground (-): Connect the Black wire to a clean, paint-free metal point on the vehicle's chassis or the negative wire of the existing circuit. A solid ground connection is critical for performance.
-
Consider the Switch: Many of our models (like the DS2013-PDC-S) feature a physical ON/OFF button. This is a game-changer! It allows you to wire directly to a constant battery source without worrying about the LED light draining your battery when the vehicle is parked.
Step 3: The "Bench Test" (Verification)
Before you pop the socket into the hole, test it!
-
Turn the key (or flip the switch).
-
Check the Voltmeter: Does the LED display light up? If it reads between 12.0V and 14.5V, you have a solid connection!
-
Check the Charge: Plug in your phone. Does it say "Fast Charging" or "PD Charging"? If yes, congratulations! You’ve just modernized your vehicle.
Troubleshooting & FAQ
Encountering a small issue during a DIY project is normal. Here are the answers to the most common questions.
Q1: I've installed the socket, but it has no power and the LED is off. What's wrong?
A: 90% of the time, the issue is with a fuse or a bad connection.
-
Check the Inline Fuse: As shown in the picture, many wiring kits come with an inline fuse. Unscrew the holder and visually inspect the small wire inside the fuse. If it's broken, the fuse is blown and needs to be replaced.
-
Check Your Ground: Ensure the black wire is connected to a clean, paint-free metal point on the vehicle's chassis. A bad ground is a common culprit.
-
Confirm Power: Use a multimeter to confirm you have 12V+ on your red wire.

Troubleshooting 101: No power? The inline fuse is the first place to check. Many wiring harnesses, including ours, have one for safety. Simply unscrew the holder to inspect the fuse.
Q2: The voltmeter shows a reading of 12.2V. Is my battery dying?
A: Not necessarily. When the engine is off, a healthy battery will read between 12.0V and 12.6V. When the engine is running, you should see a reading between 13.5V and 14.5V. This indicates your alternator is working correctly to charge the battery. This little voltmeter is now your first line of defense in monitoring your vehicle's charging system health!
Q3: My USB socket has a physical on/off button. Can I wire it directly to the battery?
A: Yes, you absolutely can! That's the key advantage of models with a built-in switch. It allows you to wire directly to a constant power source without worrying about the LED display causing a slow "parasitic drain" on your battery when the vehicle is parked. This is the perfect setup for anyone who needs to charge devices when the engine is off, like in an RV, boat, or at a campsite.
Conclusion: A Small Change, A Big Impact
You don't need to buy a new car to get new car tech. For less than the price of a tank of gas and 30 minutes of work, you can have a dashboard that charges your gear instantly and looks professional.
Whether you are upgrading an overland rig, a fishing boat, or just your daily commuter, we have the exact socket to fit your needs.
Ready to upgrade? Browse our full collection of PD & QC3.0 USB Chargers and Voltmeters here.
Dejar un comentario