
So installieren Sie einen Batterietrennschalter: Ein Profi-Leitfaden zu Standort und Verkabelung
Von manuellen Drehknöpfen bis hin zu Fernbedienungen: Meistern Sie die Installation für Ihr Auto oder Boot
Eine leere Batterie ist eines der häufigsten und ärgerlichsten Probleme für jeden Fahrzeughalter, insbesondere bei Autos, Booten oder Wohnmobilen, die längere Zeit ungenutzt stehen. Der Kriechstrom moderner Elektronikgeräte kann die Batterie langsam entladen. Darüber hinaus sind die sichere Durchführung von Elektroarbeiten und die Diebstahlsicherung des Fahrzeugs wichtige Aspekte.
Die Lösung für all diese Probleme ist ein einfaches, robustes Gerät: ein Batterietrennschalter (auch Hauptschalter oder Not-Aus-Schalter genannt).
Dieser Leitfaden enthält alles Wissenswerte: Wie Sie den richtigen Typ auswählen, wo Sie ihn für maximale Sicherheit installieren sollten und eine Schritt-für-Schritt-Anleitung sowohl für manuelle als auch für fortschrittliche ferngesteuerte Modelle.
 Zunächst einmal: Welchen Batterieschalter benötigen Sie?
Ihre Produktseite bietet eine große Auswahl, die sich in einige wenige Hauptkategorien einteilen lässt. Die Wahl des richtigen Produkts hängt von Ihren Bedürfnissen hinsichtlich Komfort und Sicherheit ab.
-
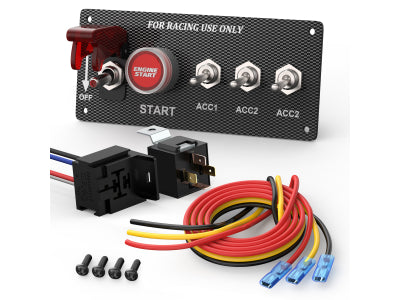
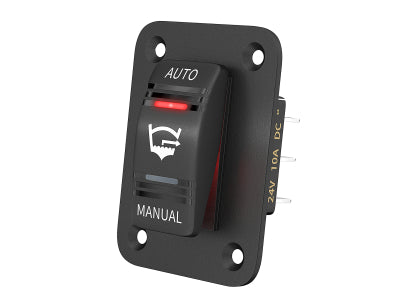
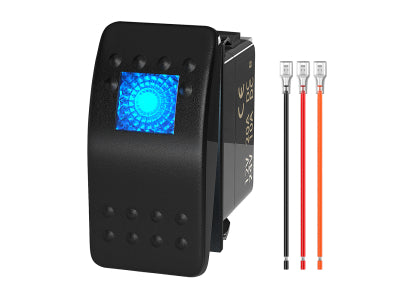
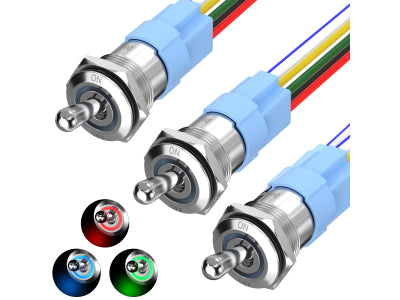
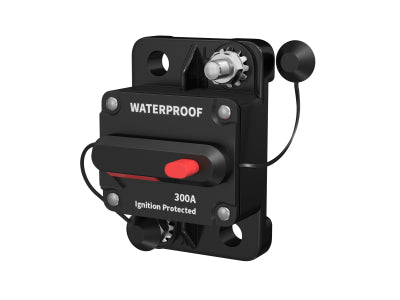
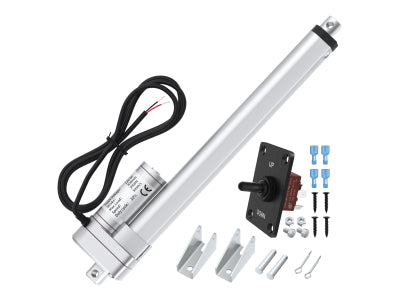
Manuelle Drehschalter: Das sind die klassischen, robusten roten Schalter. Sie sind unglaublich zuverlässig und bieten eine klare visuelle Bestätigung des Stromkreisstatus. Ideal für: Einfachheit, Zuverlässigkeit und Anwendungen, bei denen ein einfacher und häufiger Zugang zum Batteriefach besteht (z. B. Rennwagen, Boote).
-
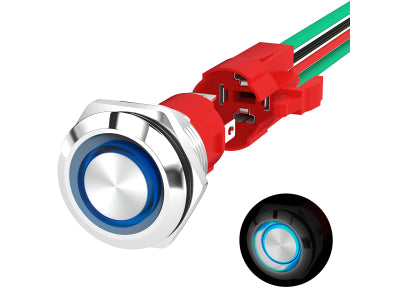
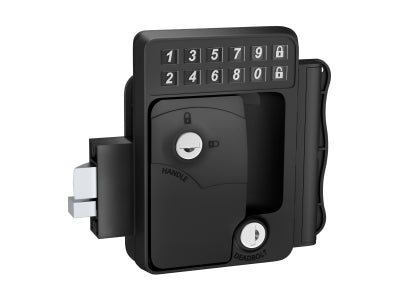
Schlüsselschalter: Diese funktionieren wie ein Drehschalter, erfordern aber einen physischen Schlüssel zum Drehen und/oder Abziehen. Ideal für: Diebstahlschutz- und Sicherheitsanwendungen zur Verhinderung der unbefugten Nutzung eines Fahrzeugs oder einer Ausrüstung.
-
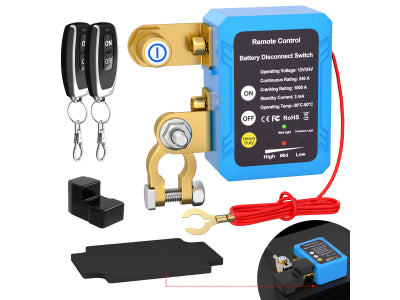
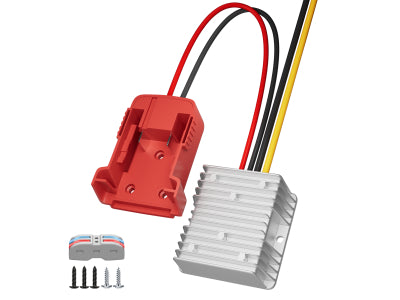
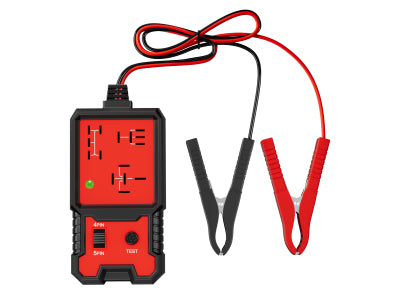
Fernsteuerungsunterbrechungen: Diese Geräte verwenden ein Verriegelungsrelais, das Sie mit einer Fernbedienung steuern. Das bietet maximalen Komfort, da Sie die Batterie von überall in der Nähe Ihres Fahrzeugs abklemmen können, ohne die Motorhaube oder eine Heckklappe öffnen zu müssen. Ideal für: Für Alltagsfahrer, Wohnmobile und alle, die maximalen Komfort und Diebstahlschutz wünschen.
 Wo ist der beste Ort für den Einbau eines Batterietrennschalters?
Sie haben im Wesentlichen zwei Möglichkeiten, aber eine davon wird für die meisten Anwendungsfälle dringend empfohlen.
Option 1 (Empfohlen): Das Pluskabel der Batterie
Die Installation des Schalters am Hauptpluskabel (+) der Batterie, möglichst nah am Batteriepol , entspricht dem Industriestandard.
-
Warum es die beste Wahl ist: Diese Methode trennt die Verbindung. gesamtes Fahrzeug Die Stromversorgung erfolgt über die Batterie. Wenn der Schalter ausgeschaltet ist, erhält keine Komponente (Anlasser, Lichtmaschine, Sicherungskasten) Strom, was ein Höchstmaß an Sicherheit bei Wartungsarbeiten und eine vollständige Abschaltung gewährleistet.
Option 2: Das Minuskabel der Batterie
Manche Schalter sind für den Minuspol (-) ausgelegt. Auch dies ist eine gültige Methode, den Stromkreis zu unterbrechen.
-
Wozu wird es verwendet? Die Arbeit an diesem Anschluss gilt oft als etwas sicherer, da die Wahrscheinlichkeit eines Kurzschlusses geringer ist, falls der Schraubenschlüssel beim Arbeiten am Minuspol versehentlich das Chassis berührt. Allerdings wird dadurch die Plusleitung nicht getrennt, sodass das gesamte elektrische System des Fahrzeugs weiterhin unter Spannung steht.
Bei 99 % aller Anwendungen sollte der Schalter am Pluskabel angeschlossen werden.
Anleitung zum Einbau eines manuellen Batterieschalters (Allgemeine Anleitung)
Dieses Verfahren gilt für die meisten Dreh-, Schlüssel- oder Messerschalter.
-
Sicherheit geht vor: Den Minuspol der Batterie vollständig abklemmen und beiseitelegen, um ein versehentliches Schließen des Stromkreises zu verhindern.
-
Suchen Sie das Pluskabel: Identifizieren Sie das Hauptkabel, das dicke rote Kabel, das mit dem Pluspol der Batterie verbunden ist.
-
Positionieren Sie den Schalter: Suchen Sie einen sicheren, stabilen Montageort für Ihren Schalter, möglichst nah an der Batterie. Achten Sie darauf, dass er weder das Schließen der Motorhaube noch andere Bauteile behindert.
-
Trennen und durchtrennen: Trennen Sie das Pluskabel von der Batterie. Schneiden Sie das Kabel mit einem robusten Kabelschneider an der Stelle durch, an der der Schalter installiert werden soll.
-
Abisolieren und Crimpen: Entfernen Sie an beiden Kabelenden etwa 1,5 cm der Isolierung. Bringen Sie anschließend mit einer geeigneten Crimpzange hochwertige Kupferkabelschuhe an den abisolierten Enden an.
-
Anschließen und Montieren: Montieren Sie den Schalter sicher. Verbinden Sie das Kabelende vom Akku mit dem „Input“- oder „Source“-Anschluss des Schalters und das andere Kabelende mit dem „Output“- oder „Load“-Anschluss. Ziehen Sie die Muttern fest an. Eine lose Verbindung kann gefährliche Hitze erzeugen.
-
Wiederverbinden und testen: Schließen Sie den Minuspol der Batterie wieder an. Schalten Sie Ihren neuen Hauptschalter auf die Position „EIN“ und testen Sie Ihr Fahrzeug.
Installationshinweis: So verkabeln Sie Ihren Fern-Batterietrennschalter
Hier trifft Komfort auf Technologie. Am Beispiel Ihres meistverkauften Modells lässt sich die Installation noch einfacher gestalten, da sie oft direkt am Batteriepol befestigt wird.

-
Sicherheit geht vor: Trennen Sie das Haupt-Minuskabel (-) der Batterie und entfernen Sie es. Trennen Sie anschließend das Haupt-Pluskabel (+).
-
Montieren Sie die Trenneinheit: Befestigen Sie das Hauptgehäuse des Ferntrennschalters direkt am Pluspol (+) Ihrer Batterie. Achten Sie darauf, dass es fest angezogen ist.
-
Schließen Sie das Hauptstromkabel an: Nehmen Sie das zuvor von der Batterie entfernte Hauptpluskabel und befestigen Sie es fest am Gewindebolzen der Ferntrenneinheit.
-
Schließen Sie das Erdungskabel an: Die Fernbedienungseinheit hat ein dünnes, schwarzes Kabel. Dies ist die Masseverbindung. Verbinden Sie den Ringkabelschuh dieses Kabels direkt mit dem Minuspol (-) der Batterie.
-
Wiederverbinden und testen: Schließen Sie das Haupt-Minuskabel Ihrer Fahrzeugbatterie wieder an den Minuspol an. Das Gerät sollte nun mit Strom versorgt werden.
-
Kombinieren und verwenden: Befolgen Sie die Anweisungen, um Ihre Fernbedienung zu koppeln. Testen Sie die Verbindung, indem Sie auf der Fernbedienung die Taste „AUS“ drücken – Sie sollten ein deutliches Klicken hören, wenn das Relais die Stromzufuhr unterbricht. Drücken Sie anschließend die Taste „EIN“, um die Verbindung wiederherzustellen.
Sehen Sie sich unser 3D-Video an, um einen vollständigen Überblick über die Funktionsweise des Ferntrennschalters zu erhalten.
Bewährte Vorgehensweisen für die Verwendung Ihres Batterieschalters
-
Zuerst den Motor abstellen: Niemals Schalten Sie den Hauptschalter bei laufendem Motor auf „AUS“. Dies kann einen massiven Spannungsstoß der Lichtmaschine verursachen, der die empfindliche Fahrzeugelektronik (Steuergerät, Stereoanlage usw.) zerstören kann.
-
Verbindungen prüfen: Überprüfen Sie regelmäßig, ob alle Hochstromverbindungen fest sitzen.
-
Fernbedienungen sicher aufbewahren: Bei Fernbedienungen sollten Sie eine Fernbedienung an Ihrem Hauptschlüsselbund aufbewahren und die Ersatzfernbedienung an einem sicheren, leicht zugänglichen Ort lagern.
Fazit: Übernehmen Sie die Kontrolle über Ihren Akku
Ein Batterietrennschalter ist eine der praktischsten und effektivsten Aufrüstungen, die Sie vornehmen können. Er schützt Ihre Batterie, erhöht die Sicherheit bei Wartungsarbeiten und bietet einen wirksamen Diebstahlschutz. Ob Sie sich für einen klassischen manuellen Schalter oder ein modernes ferngesteuertes Gerät entscheiden – eine fachgerechte Installation ermöglicht Ihnen die volle Kontrolle über die Stromversorgung Ihres Fahrzeugs.
Sind Sie bereit, die Angst vor leeren Akkus endgültig zu beenden? Hier finden Sie unsere gesamte Kollektion an Batterietrennschaltern.
Hinterlassen Sie einen Kommentar