
Mastering Amperage Logic, Identifying Short Circuits, and Preventing Electrical System Failure
In the complex architecture of modern off-road vehicles and marine vessels, the fuse is far more than a simple metal strip. It is a precision-engineered safety device—the "weakest link" by design. Its sole purpose is to self-destruct before an electrical surge can melt wire insulation or ignite a dashboard fire. However, a "popped" fuse is rarely the root cause; it is a technical signal that the circuit has exceeded its thermal or electrical limit.
To simply replace a fuse without a diagnostic mindset is to ignore the warning signs of a failing system. This guide provides a professional blueprint for identifying fuse types, diagnosing the mechanism of failure, and implementing long-term circuit reliability.

Figure 1: "Testing for continuity is the only way to be 100% sure. Never guess when it comes to electrical safety."
I. Technical Matrix: Understanding ATC/ATO Color Coding and Application
In the 12V electrical world, standardized color coding (per SAE J1284 standards) is a mission-critical safety feature. The color of a blade fuse is not an aesthetic choice; it is a visual shorthand for the Calibrated Thermal Failure Point. Regardless of the brand, an ATC fuse of a specific color must blow at precisely the same current to protect the downstream wiring.
Below is the definitive technical matrix based on the industry-standard basic catalog numbers. Use this as your primary diagnostic reference:
| Basic Catalog (Amp) | Color Code | Typical Application (Practical Use) |
| ATC-1 | Black | Micro-sensors, clock memory, digital logic feeds. |
| ATC-2 | Gray | Precision ECU signal lines, anti-theft sensors. |
| ATC-3 | Violet | Low-draw LED accent lighting, small relays. |
| ATC-4 | Pink | Instrument cluster illumination, sensor clusters. |
| ATC-5 | Tan | Radio memory, small dash displays, mirror controls. |
| ATC-7.5 | Brown | Interior dome lights, glove box lights, trunk lights. |
| ATC-10 | Red | The Cabin Workhorse: Standard radio, USB ports, tail lights. |
| ATC-15 | Blue | Fuel pumps, small auxiliary light bars, wiper motors. |
| ATC-20 | Yellow | Cigarette lighter sockets, headlights, horn, small fans. |
| ATC-25 | Clear | Power windows, seat adjusters, heater blowers. |
| ATC-30 | Green | Heavy Duty: High-power audio amps, HVAC systems. |
| ATC-35 | Blue/Green | Specialized high-current marine pumps, sub-panels. |
| ATC-40 | Orange | Main Line Protection: Large cooling fans, battery feeds. |
Why Is Color Consistency Crucial?
The thickness of the metal "bridge" inside the fuse is precisely engineered to match these colors. A Red (10A) fuse has a significantly thinner bridge than a Yellow (20A) fuse. If you install a 20A fuse into a 5A circuit, you have quadrupled the amount of energy required to break the circuit. By the time that 20A fuse pops, the wire insulation has already melted. Consistency is your fire insurance.
II. The Physics of Failure: Overload vs. Short Circuit
Before inserting a replacement, the nature of the failure must be analyzed. The physical appearance of a blown fuse tells a technical story.
- The Overload (Thermal Fatigue): If the metal strip is broken but the plastic casing is clear and uncharred, the circuit was likely overloaded. This occurs when the cumulative draw of all devices on the wire exceeds the fuse rating (e.g., adding a fridge to a 10A lighting circuit).
- The Short Circuit (Instantaneous Arc): If the inside of the fuse is blackened, charred, or shows metal "splatter," a catastrophic short to ground occurred. A positive wire has likely rubbed through its insulation and touched the metal chassis.

Figure 2: "The visual autopsy: A melted bridge (left) indicates a slow overload; a charred interior (right) indicates a catastrophic short circuit."
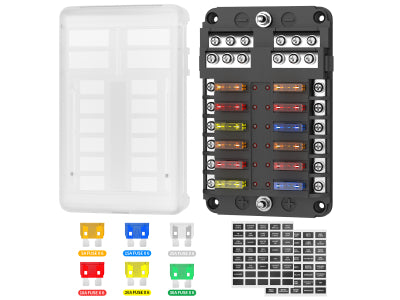
III. Physical Form Factors: Choosing the Right Size
Even if the amperage is correct, a fuse must fit the housing of your Fuse Block.
- Micro / Mini: Common in modern, space-constrained vehicle dashboards. They provide the same protection as larger fuses but in a smaller footprint.
- ATO / ATC (Standard): The industry standard (19mm width). These are the most common fuses used in aftermarket panels for off-road and marine builds.
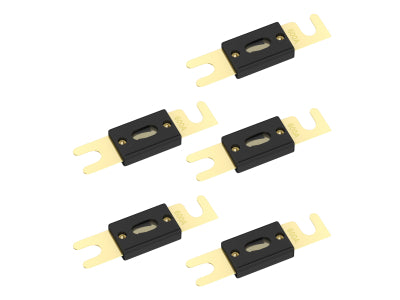
- Maxi: Massive fuses designed for the "Heavy Lifters" near the battery. They handle main feeds and prevent the total system from melting down.
Internal Link: To learn how these different sizes integrate into a professional-grade distribution system, check our System Layout Guide.

Figure 4: "Size matters: From space-saving Minis to heavy-duty Maxis, ensure your emergency kit matches every hub in your specific vehicle."
IV. Tools of the Trade: The Fuse Puller vs. Pliers
Pragmatism dictates that you use the correct tool for the job.
- The Danger of Pliers: Many DIYers reach for needle-nose pliers. This is a rookie mistake. Metal pliers can slip, cracking the plastic housing of the Fuse Holder. Worse, if the circuit is live, metal pliers can cause a secondary short circuit between the terminals, leading to a dangerous arc flash.
-
The Pro Choice (Fuse Puller): Always use a dedicated plastic fuse puller. It provides even, vertical pressure and is non-conductive, protecting both the component and your hands.
V. The Professional Diagnostic and Replacement Protocol
- Locate the Hub: Engine bay for main power; cabin for electronics. Use the label on the cover.
- Continuity Check: Set your Digital Multimeter to "Beep" mode. Touch the metal tabs on the top of the fuse. No beep = Blown fuse.
- Extraction and Inspection: Pull the fuse using your puller and refer back to the "Physics of Failure" to determine if you have an overload or a short.
VI. The "Golden Rule" and the "Pro-Tip"
THE GOLDEN RULE: Never upsize a fuse. If a 10A fuse blows, never replace it with a 20A. You are inviting a fire.
Pro-Tip for the Pragmatic Male Audience:
If you’ve just bought a "pre-owned" vehicle or boat, trust nothing. Previous owners often "fix" recurring problems by inserting a higher-amperage fuse (e.g., putting a 30A Green fuse where a 10A Red one belongs). Audit your fuse box against the factory manual immediately. If you see a mismatch, you’ve found a hidden fire hazard.
VII. The Field Emergency Kit: What to Carry
A well-prepared tool chest should contain a "Big Three" assortment. Don't just carry a random handful; be systematic.
- The Essentials: Carry at least five of each: 10A (Red), 15A (Blue), and 20A (Yellow). These three colors cover 80% of auxiliary accessories like lights, fridges, and USB chargers.
- The Specialized: Carry at least two 30A (Green) for your high-power compressors or amplifiers.
- The Tool: Keep a dedicated fuse puller clipped inside the lid of your kit.
Conclusion: Maintenance Over Repair
Safely replacing a fuse is a fundamental skill for any vehicle owner, but the goal should be to prevent them from blowing in the first place. Every six months, inspect your Fuse Hub. Look for signs of heat (discolored plastic) and ensure all terminals are tight. Vibrations from corrugated roads and waves can loosen connections, leading to high resistance and "nuisance" fuse blows.
Ready to secure your electrical system? Browse our selection of Professional-Grade Fuses, Breakers, and Distribution Blocks to ensure your next adventure is powered safely.


